
I absolutely love project management tools! I’ve spent years mastering platforms like ClickUp, Asana, Trello, and many others, and I genuinely enjoy setting them up to create efficient workflows. These days, for large teams and complex projects, ClickUp is my go-to, but for a simple content calendar for Temaki, I’ve chosen Notion.
Notion is an all-in-one solution that’s not only flexible enough for personal use but also scalable for big teams. It’s perfect for a content calendar that keeps everything in one place—clear deadlines, stages, and assigned owners—all presented in a way that makes managing content both straightforward, transparent, and fun!
In this article, I’ll show you exactly how I’m using Notion to build Temaki’s content calendar. Whether you’re managing a personal project or coordinating a full-scale content team, you’ll be able to replicate my process. So, grab your coffee, get comfortable, and let’s dive into it.
Setting Up Your Content Calendar
A content calendar is at the heart of any content strategy—it helps keep your entire team organized and aligned.

Here’s how you can set up an effective content calendar in Notion, with step-by-step instructions:
Defining Your Needs
Before anything else, take some time to define your team’s specific content planning needs. Are you focusing on blog posts, social media, video content, or all of the above? Which stages does each piece of content go through? How many people need to be involved? Understanding your team’s specific workflow will help you create a system that effectively captures and organizes your work.
Creating a New Database
Setting up your content calendar in Notion starts with building a strong foundation—a centralized database that will house all your content pieces. This database will be the main hub for everything related to your content, from ideas and drafts to finalized pieces ready for publication.
- Create a New Page: Open Notion and create a new page. Name this page “Content Calendar” or something similar.
- Add a Database: On your new page, add a database by selecting “Table” under the “Database” options. This database will serve as the main repository for all your content items.
- Add Relevant Properties: Customize your database properties.
For a content calendar, consider adding the following properties:
- Title
- Status
- Content type
- Author
- Publication Date
- Tags
- URL
- Featured Image
Adding Articles
Begin adding content items to your calendar. For each piece of content, fill out all the relevant properties. Even if you don’t have a clear content plan yet, having a few dummy articles will help with the rest of the setup.
Creating Different Views
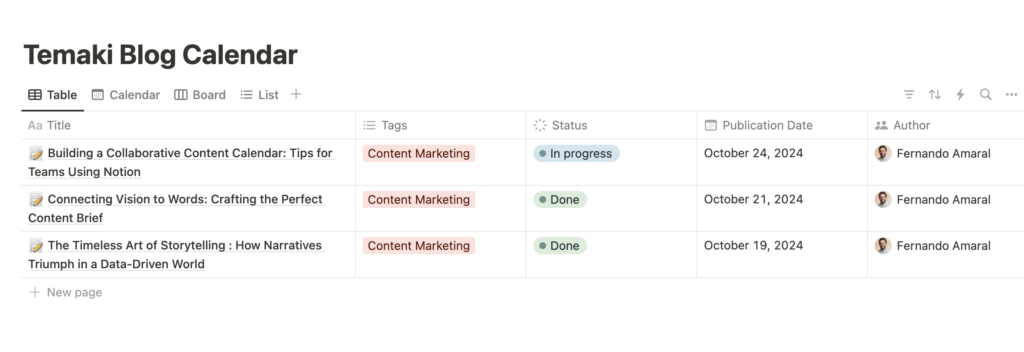
After setting up the database and adding some articles, create a “Calendar” view. This will allow you to see all content items arranged by their publish dates. To do this, click on the “+ Add a View” button and select “Calendar.” Name it appropriately (e.g., “Content Calendar View”).
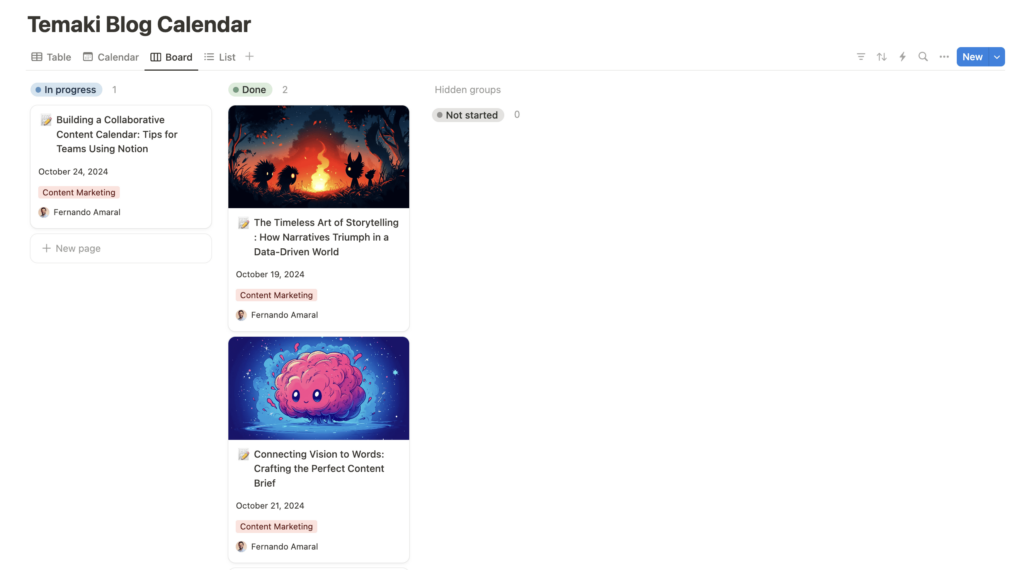
To track content through various stages of production, create a “Board” view. This is especially useful for visualizing your workflow (e.g., “Not started,” “In progress,” “Done”). Click “+ Add a View,” then select “Board.” Set the grouping based on the “Status” property.
Finally, create a “List” view for a more detailed breakdown of each content piece. This is helpful for managing more granular tasks and seeing detailed information like deadlines and assignees.
Using Templates
Click on the dropdown menu next to the ‘New’ button in your database and select ‘Create a Template‘. This page will serve as your template for all future articles.
Name your template something like ‘Article Template’ so it is easy for your team to find and use and set up the page with placeholders for all the necessary sections.
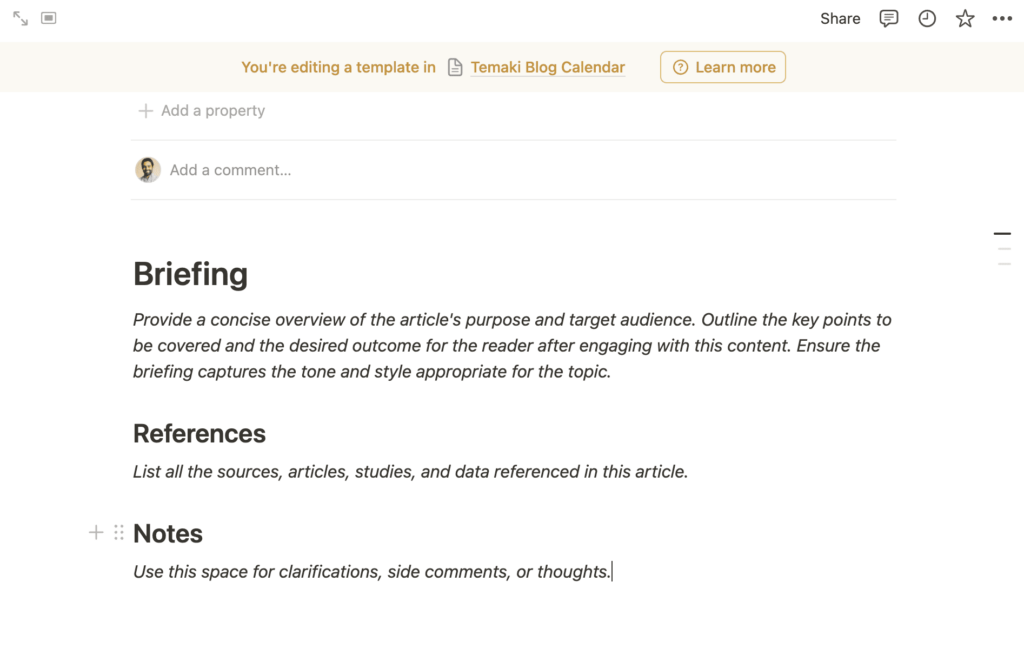
Every time you need to create a new article, simply select the ‘Article Template’ from the ‘New’ dropdown in your content calendar database. This will automatically generate a new page with all the predefined sections and properties, saving you time and ensuring consistency across all your content pieces.
As you use the content calendar, make adjustments based on what works best for your team. The flexibility of Notion means you can easily tweak the setup to improve your workflow.
Advanced Features
Once your team has established a good workflow using Notion’s basic features, you may decide to take advantage of some of Notion’s advanced options to boost productivity even further.
Filters are available in every view to quickly display specific types of content, such as posts due within the next week or items assigned to a particular team member. Sorting can also help prioritize items based on urgency or publish date. Use tags to categorize content by topic or any other criteria. This helps in filtering and finding content items easily.

For each content piece, set reminders for deadlines that will prompt team members as due dates approach.
If your team handles a large number of content pieces, automation can save hours of manual work. Notion provides integration with tools like Zapier and Make, which allows you to automate many repetitive tasks—like creating task pages, assigning members, or sending notifications.
You can also set up integrations with tools like Slack to automatically create Notion pages based on new events in your team’s communication channels, streamlining the process of capturing ideas and requests.
Building a custom dashboard in Notion is another great way to manage your content calendar. You can set up a dashboard that includes links to different views, an overview of upcoming deadlines, and relevant team announcements. Dashboards can keep everyone aligned on priorities and provide a snapshot of the overall project status.
Effective Collaboration Techniques
Building a content calendar is just the beginning—effective collaboration is what turns a well-planned schedule into high-quality content.
One of the essential aspects of collaboration is ensuring that every team member knows their role. Within your Notion calendar, assign tasks to each team member with clear deadlines and descriptions. This not only helps with accountability but also allows everyone to know who is responsible for what at a glance.
Notion’s comment and discussion features are perfect for encouraging feedback without relying on endless email threads. You can leave comments directly on tasks or specific pieces of content, enabling smooth communication between team members. Encourage your team to use these features to keep all discussions in one place, making it easy for everyone to follow the conversation.

Schedule regular team check-ins using Notion to track the progress of ongoing projects. Create a weekly or bi-weekly check-in template that allows team members to update the status of their content pieces. These updates will give you a quick overview of how everything is progressing and will help keep everyone on the same page.
Now it’s your turn to explore the possibilities and elevate your content strategy. As you adopt these tips and techniques, remember to adapt them to suit your team’s specific needs. Dive into Notion, set up your content calendar, and watch as your team’s efficiency and creativity soar.